Calendar Islands Yawl Modeling Continued

Fleshing out the Calendar Islands Yawl

Modeling the Interior

While I am actually breaking out the geometry of the final 3D computer model, the interior of the "in-the-flesh" model was glued in yesterday and I'll prime it today.

Cutting out quarter scale bulkheads for Calendar Islands Yawl interior.

It never ceases to amaze me how everything just fits. Paper patterns are Spray77 tacked to 1/8" plywood and cut to the line on the bandsaw. Then the parts are glued into place with little to no refinement and they fit well. It makes this method of proving out the hull design quite efficient.

After hull turnover in actual full-size construction, this is what the boat interior will look like.

The beauty of kit construction, is that we set up stem, bulkheads, and transom on a CNC cut, self-jigging strongback. And after planking, we turn over the hull and the interior structure is already complete. In traditional construction, the molds would be removed and bulkheads fit in their place. Kit construction allows the professional and home-builder to skip the time consuming steps of making patterns and scribing in bulkheads.

After turn over, the tank tops are put in place. They play an important structural role in stiffening this very light boat.

Stay up to date with me as next I'll prime the hull and make paint choices. Furthermore, the cutting files will be ready for CNC cutting of the first kit. 


Modeling in the Flesh and Screen

 Modeling the hull

After slicing and dicing the hull "shell" in the computer, I had the parts cut and assembled them into a quarter scale model. Modeling is a great way to test the plank shapes and make sure the lines look good in 3D reality. 

The CNC cut parts delivered by CNC Routing & Design in Camden, Maine.


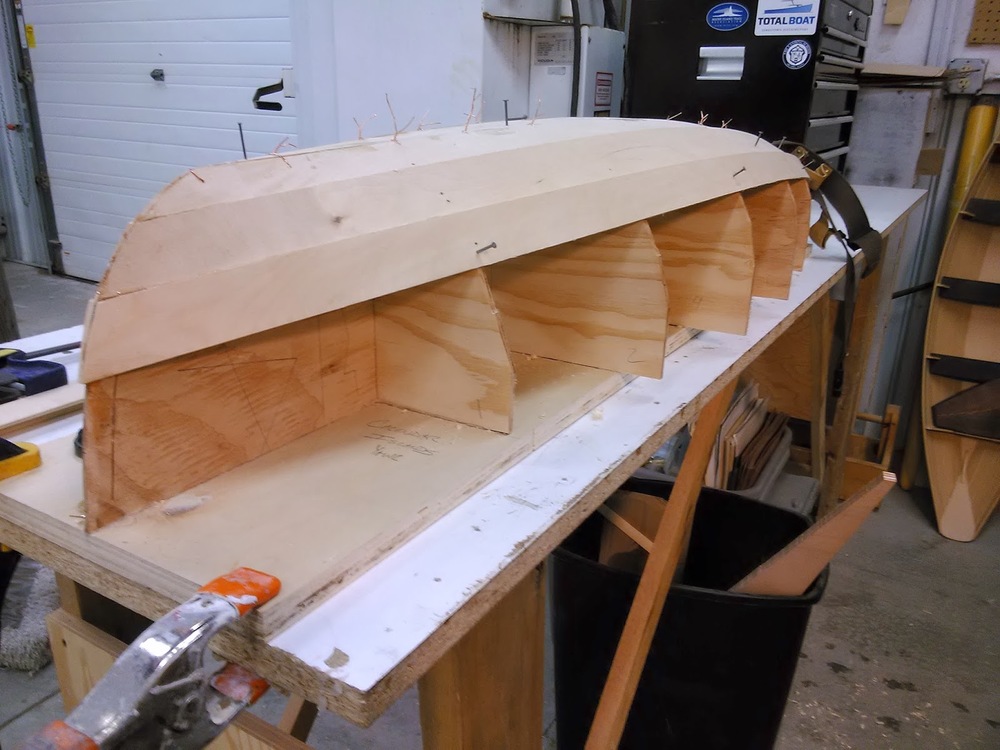
The molds set up and plank-keel attached. The molds are stand ins for the permanent bulkheads that will be set up in the actual boat. The molds are set up using hot glue.

Planking up the model over the molds. The planks (1/8" thick ply) fit well and the lines came out as fair as I could have hoped.
The CIY model with outer stem and gunwales attached. I slightly tweaked the sheer.

Aft view showing a very pretty transom. I also made slight tweaks to the width of the strake below the sheer, but most people would never notice. Not me; I see a line that's a 64th of an inch off!

Once I was assured that the hull aesthetics and plank fits were "right", I proceeded to finish modeling the interior of the hull and, finally, designing the strongback system, no small task. I'll report on this next post and hopefully show some paint on the model, too!


A Real Hull Model

The Calendar Iands Yawl

Hull Modeling in the flesh: part 1

CNC cutting parts for a quarter scale model

The 3D computer model is sliced up into sections that become molds for defining the hull shape.


You can see the molds formed now, trimmed to the hull surface,  and one more to go!
The hull is planked and ready to be broken up into the "flat" 2D geometry.

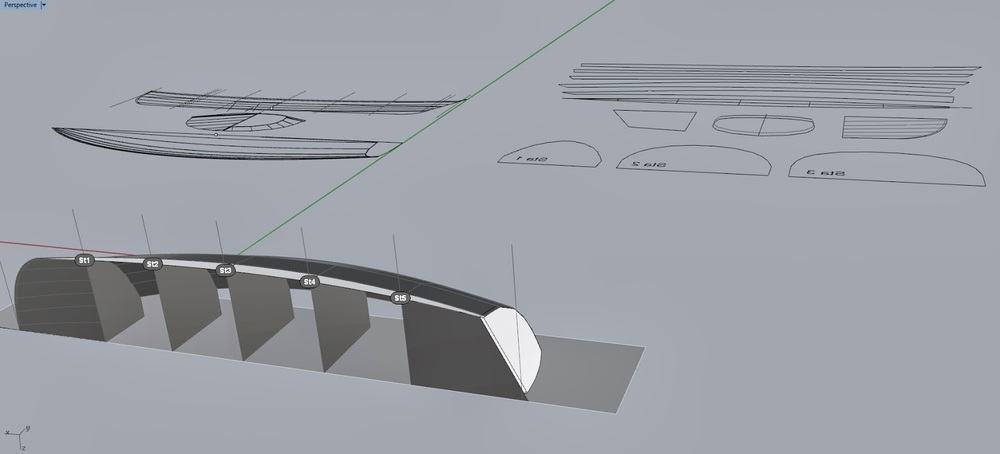
A neat screenshot that shows the 3D and 2D nature of the work: in the foreground is the 3D hull model. In the background is the geometry flattened onto the "construction plane".
This is the file with the 2D geometry as received by the CNC cutter, CNC Routing & Design in Camden, Maine. Tim will load the file into his Shopbot software, make toolpaths, and cut the parts.

The ShopBot machine cuts to my lines with a couple thousands of an inch accuracy. These are the planks of the boat, the bottom keel plank in the center and the sheer strake to the far right and left.

The molds of my quarter scale kit around which the planks will be wrapped and checked for fairness and for fit.

Calendar Islands Yawl 16 Update

Specs
LOA 15' 6"
Beam 5' 2"
Anticipated Hull weight 150-200 lbs
Displacement ~520 lbs


Here are some screen shots of the CIY model with lapstrake planking. The garboard is actually stitch-and-glued to the bottom, glassed, then the rest of the planks are plywood lapstrake with no fiberglass required. The bottom exterior is definitely oriented towards a lot of beaching as this is a sail-and-oar dinghy with an emphasis on sailing.


The waterline shows quite a bearing aft which should allow for a good planing when the wind is up and the crew is sitting aft and hiking out.


Now that the hull is complete, I can begin thinking about how to layout the interior structure with CNC cutting and kit building in mind but also so that the boat can be scratch built from just the plans or full size patterns.


I'll also sketch the rig but I bet folks know what the rig will be since its implied in the name. The CIY is named for the over 365 islands that dot Casco Bay. These islands and the sailing around them are the intended waters for this exciting boat.


The plan is to find a willing boat builder out there to build the first hull. I will sell the kit at my cost. Its a great way for someone to get into the boat they want for significantly less than what will be the retail cost.